The old Pentium was getting a bit noisy and had trouble playing high definition video at 1080p.While I was in replacement mode I went ahead and purchased a new case…. It has a built in VFD 2 line display as well as an infra red receiver and it is all supported by Linux.
I finally got around to replacing my old Pentium 4 mythtv box with a Intel Core 2 Duo based one. The old Pentium was getting a bit noisy and had trouble playing high definition video at 1080p.
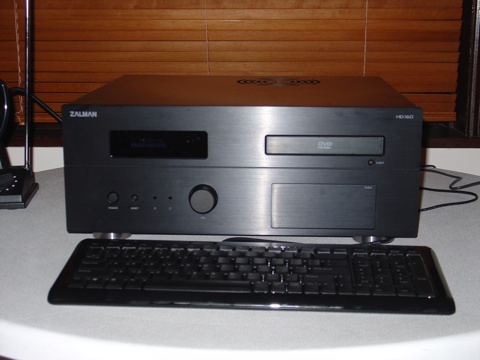
While I was in replacement mode I went ahead and purchased a new case. After a lot of research I settled on the Zalman HD160. It has a built in VFD 2 line display as well as an infra red receiver and it is all supported by Linux. Other parts used were an ASUS P5W DH Deluxe motherboard, a Gigabyte GeForce 7600GT, Silent-Pipe II video card, a Seagate Barracuda 320GB hard disk, a Zalman CNSPS9500 CPU fan, and a Intel Core 2 DUO E6400 CPU.
Here is a picture of the final product (click on it for a full resolution version). This box it just amazingly fast and quiet as a mouse.
Here are some of the things required to make the remote and VFD display work on linux.
First you will need to download both the iIRTrans Server and the IRTrans lcdproc driver and install them as per the instructions. I installed mine in /usr/local/share
You will need to create a remote control definition for the one shipped with the HD160. You can either use the “IRTrans ASCII Client” to create your own or just download the one I created from the link below and copy it into /usr/local/share/irtrans/remotes
Zalman.rem
If you want the power button on the remote to turn the Zalman on/off you will need a switches.cfg. Here is mine for the Zalman remote
switches.cfg
This will also need to be copied into /usr/loca/share/irtrans/remotes
And here are some line I added to my rc.local to activate the 2 servers:
/usr/local/sbin/irserver -start_clock -daemon -logfile /var/log/irserver.log -pidfile /var/run/irserver.pid /dev/ttyUSB0

/usr/local/sbin/LCDd
Finally you will need to create an lircrc file for mythtv and copy it into ~mythtv/.mythtv. Click below to download mine.
lircrc
Enjoy.
UPDATE: 29 June 2007
A lot of people have asked how I got the power button on the remote to turn on the Zalman. Here are some quick instructions / screenshots.
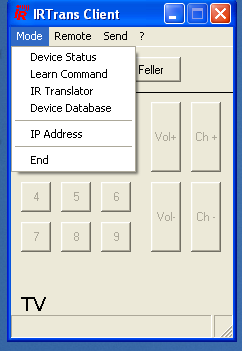
I downloaded and installed the IRTrans windows software and then ran the IRTrans GUI client. You can probably run it under Wine if you do not have access to a windows computer. I ran mine under Parallels on my Apple MacBook Pro.
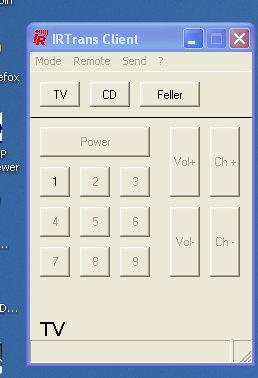
When the TCP/IP address box popped up, I put in the TCP/IP address of my mythtv box.
I then selected the device status menu.
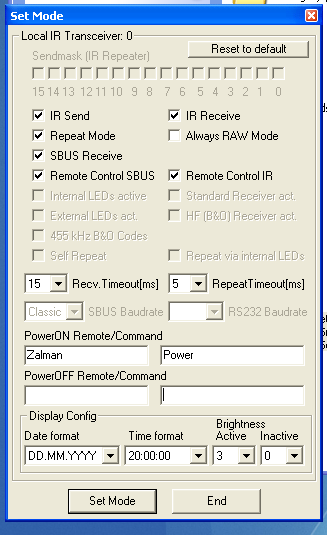
In the device status windows under the Power ON section I entered the name of my remote as trained on my mythtv box ( in my case Zalman) and in the next text box I entered the name of the button that should power on the Zalman (in my case Power),
If you cannot remember the name of your remote or the name of the button, check /usr/local/share/irtrans/remotes on your mythtv box. You may also wish to add an entry to the PowerOFF section but I have left it blank.
If you are familiar with the command line, you can use the linux client. Here are some steps to follow:
Download and compile the IRTrans ascii client from //www.irtrans.de/download/Client/client-src.zip
To compile, just unzip the source code into a directory, cd into that folder and then type in the following command:
gcc -o irclient *.c
To launch the ascii client:
./irclient localhost
1 - Send
2 - Learn
3 - Status

99 - Exit
go into the status menu by selecting 3
Select command 3
Getting Device Status ...SEND RES: 0 - 14

1 Device(s) Found:

0: - D5.03.08

99 - Exit
Select device 0
The device status should now be visible on screen
Select command 0
Device [0]: D5.03.08

Repeat Mask: x  o  o  o  o  o  o  x  x  x  o  o  o  o  o  o
0  1  2  3  4  5  6  7  8  9  10 11 12 13 14 15

Device Mode Send [20]: x
IR               [21]: x
SBUS             [22]: x
SBUS RemoteCtrl  [24]: x
RAW              [25]: o
SBUS send Repeat [27]: x

Self Repeat [36]: o

Learn Timeout   5ms [37]: o
Learn Timeout  15ms [38]: x
Learn Timeout  30ms [39]: o
Learn Timeout  60ms [40]: o
Learn Timeout  90ms [41]: o
Learn Timeout 120ms [42]: o
Learn Timeout 150ms [43]: o
Learn Timeout 250ms [44]: o

Repeat Timeout 5ms  [45]: x
Repeat Timeout 25ms [46]: o

PowerOn Remote               [52]: Zalman
PowerOn Command              [53]: Power

PowerOff Remote              [54]:
PowerOff Command             [55]:

Cancel                     [88]
Save & Exit                [99
]
Use option 52 and 53 to set the name of the remote for Power on as well as the name of the button for poweron.
Select Option 99 to save and exit.
Technorati Tags: hd160, linux, mythtv